 AR
ARWhen a golfer is struggling off the tee, it’s usually because they’re failing to do the driver basics well. Their ball position is back, their weight is forward, and they’re aiming all wrong. The result is a low, spinny slice out to the right. The way you set up your body as your teeing up the golf ball is essential to becoming a good driver of the ball. It all comes down to nailing a few basics in your driver set-up, which will allow you to hit longer drives, more consistently — Joe Plecker, Director of Instruction, Landings Club, Savannah, Georgia
The Driver Set-up Basics
- Find a level Lie
- Pick a side of the tee box
- Half ball over crown
- Add side bend
- Check ball position
- Give it a rip
Driver Set-up Basic #1: Find a Level Lie
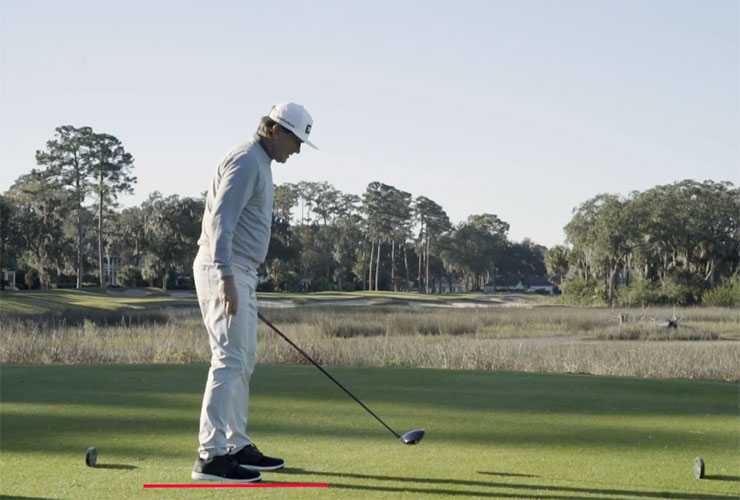
A key to keeping your game consistent is finding a level lie on the tee. Why? Because a tilted lie can affect your ball flight negatively. A ball above your feet will tend to overdraw more. Too far below and it’ll have a tendency to drift to the right. Before you tee up your driver, take a few seconds to feel with your feet for the most level lie on the tee box. Once you start looking, you may be surprised how much tilt some tee boxes have.
Driver Set-up Basic #2: Pick a Side
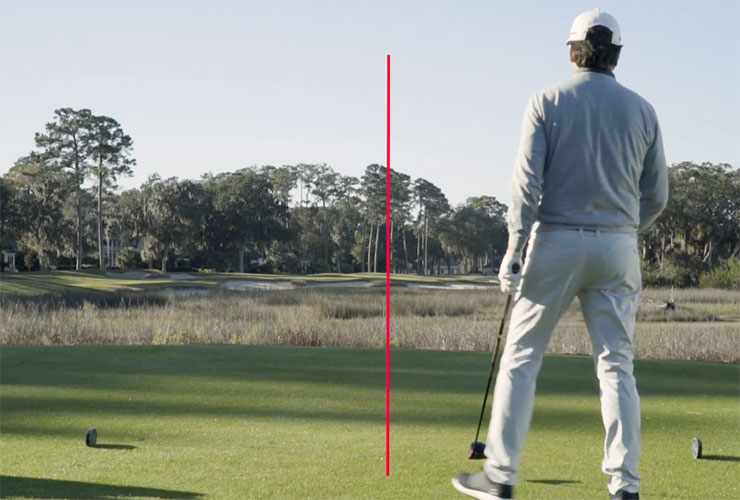
When you tee up your driver, the side of the tee box you pick should match your shot shape. You want to hit across the fairway, to give yourself more margin for error. The left side of the tee box would be a better side for a player who moves the ball from right-to-left. The right side is for a player who moves the ball from left-to-right.
Driver Set-up Basic #3: Half Ball Over Crown
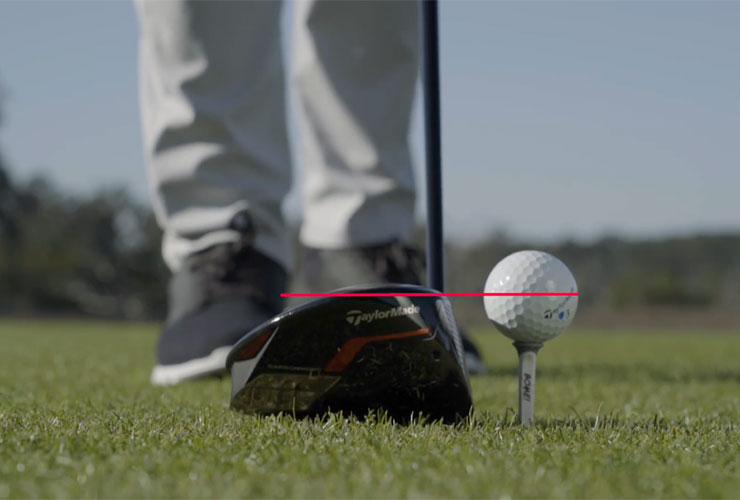
Pros think about the tee height of their driver a lot. Amateur golfers, not so much. I always tell my students to think about it this way: When you swing through and hit the ball, the bottom of your driver should remain pristine. It shouldn’t come into contact with the ground at all. To do that, you’ll need to hit the ball on an ascending blow, and tee height is essential to that. The best drives are the ones where the bottom of the club hits the top of the tee. To give yourself enough room with the modern-day drivers, that means pegging it so about half the ball is above the crown of the driver.
Driver Set-up Basic #4: Add Side Bend
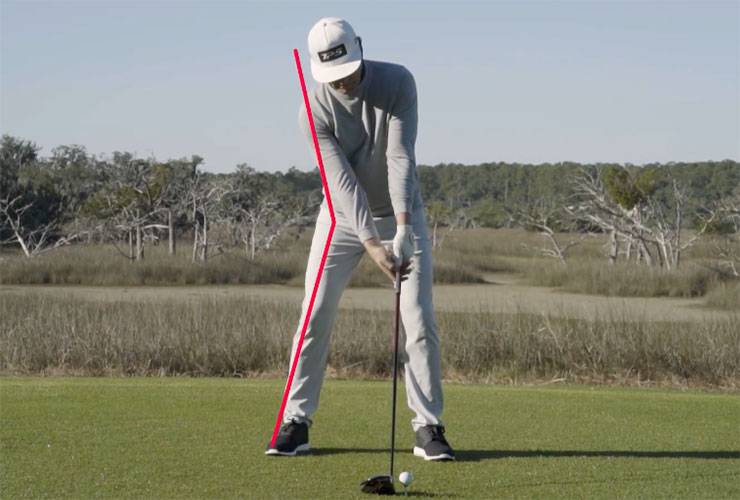
For most amateurs to hit the ball on an ascending blow, it’s best to add some side bend at address, which changes the path of my swing to hit the ball on an ascending blow, and transfer the maximum amount of energy into the golf ball. It’s a power position, but notice how when I add that side bend, the clubface isn’t moving around with it. I’m not changing my grip structure, I’m only tilting the centre of my upper body away from the target.
Driver Set-up Basic #5: Check Ball Position
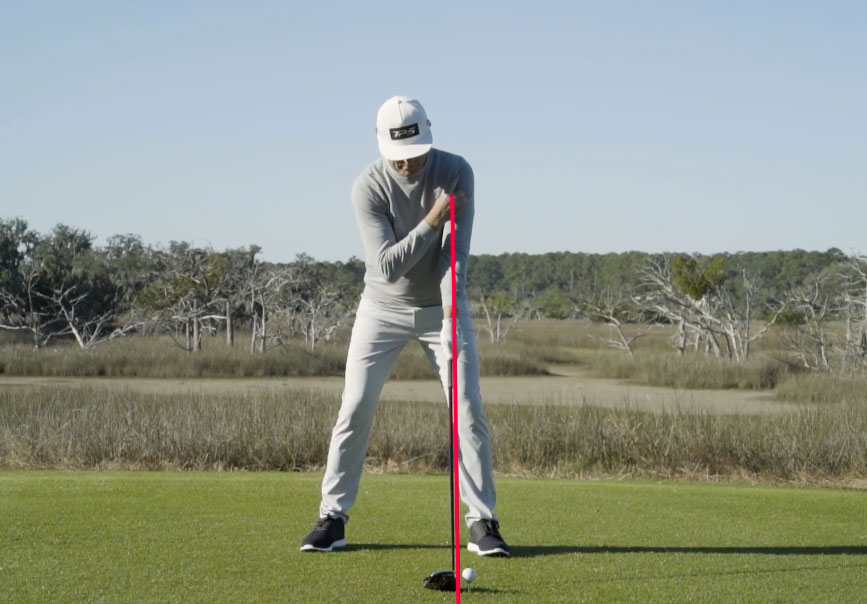
Ball position is another key checkpoint to creating that ascending blow, and I always look at the centre of the lead shoulder being in alignment with the golf ball — never in front — as a really important position. That will allow me enough room to extend my arms and create the most speed into the ball.
Driver Set-up Basic #6: Swing Away

Once we match up all these driver set-up basics, we’ll be in a good position to swing away freely. It’ll give you your best chance of hitting a great drive. If one of these basics is off when you tee up your driver, you’ll probably see a loss in both distance and direction. But the good news is they’re easy to check. With a little practise they’ll become second nature — and you’ll find more fairways because of it, too


